Watercolor Card

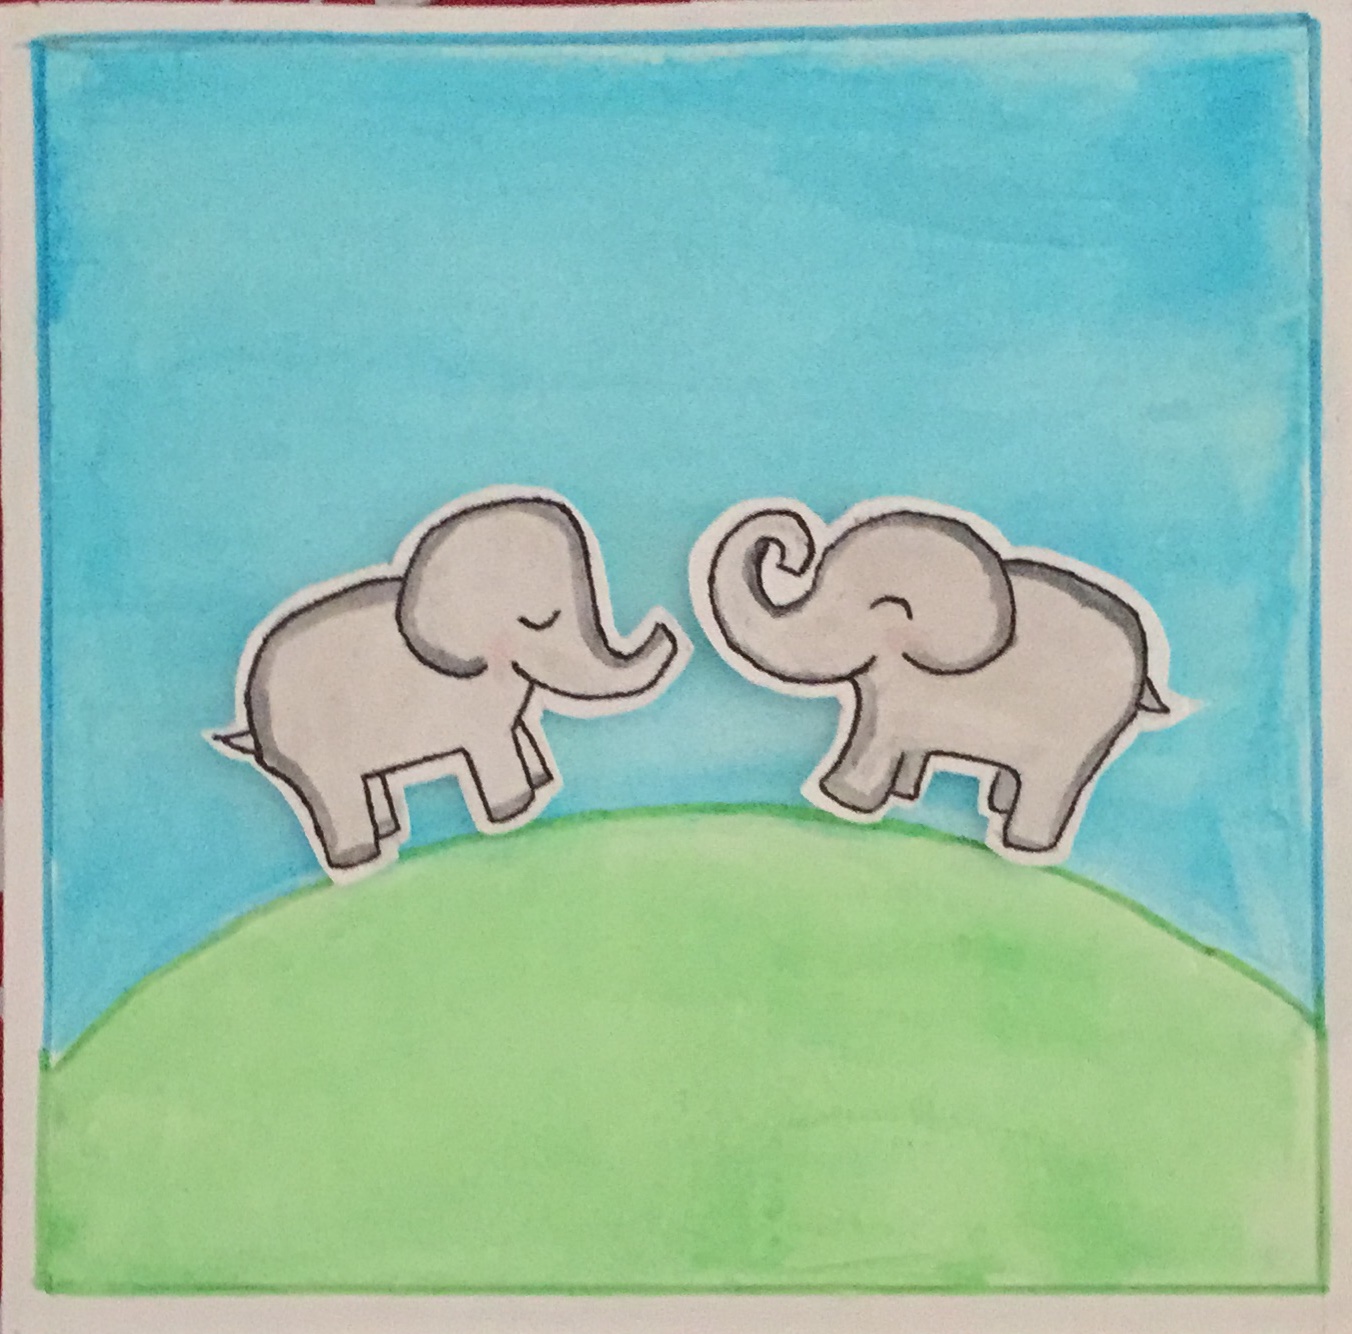
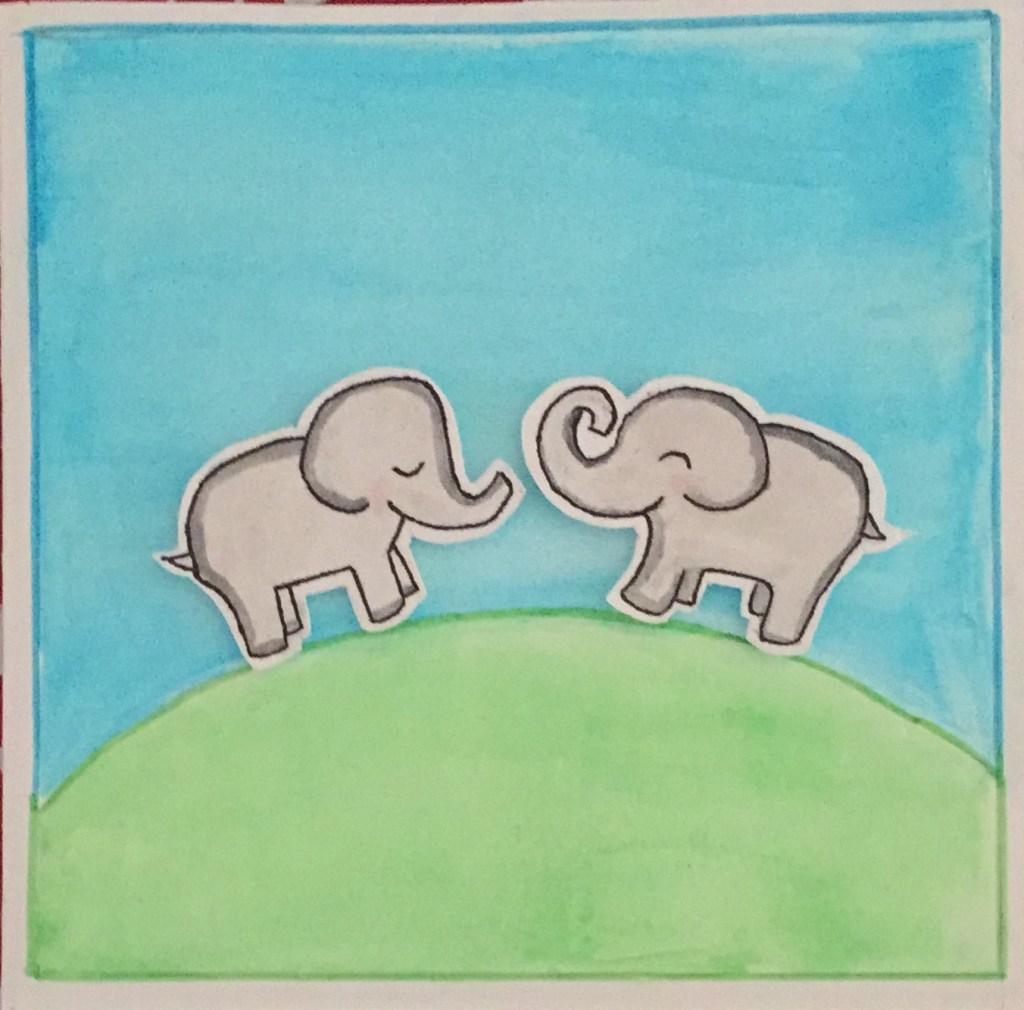
This is a cute little card I had done in watercolor a few years ago. I would say that this project is both arts and crafts, and you will find out why. I found the video link online, and after attempting to create a replica of the card shown in the video, I was happy with my results. Most of it was pretty simple. The background was the easiest part, since drawing a hill on the watercolor paper and filling in the colors is all you have to do. Making the elephants, though, was a little more complicated. In the video, the artist used stamps for each of the elephants, while the only thing I could rely on was my hands. So, after drawing a faint outline (on a separate piece of paper), I traced the shape of the elephants with a thin Sharpie (permanent marker), and quite accurately, too! It was a little difficult, but so is the next step, which is painting the elephants. It was tricky to paint while trying to prevent the Sharpie ink from bleeding into the rest of the elephant, and it was a hard to make the shadows precise. Near the end, after they dried, I cut them out, and (here comes the crafty part) stuck them on double-sided sticky foam squares to create a 3D effect. To finish it off, I used the markers of the same colors to outline and define the edges, since they had seemed a little uneven. And, that, friends, is how you make this adorable card! If you found this post helpful, please give it a like! Thanks for reading!

Mokume Gane Jewelry

This beautiful polymer clay set was created with a unique technique called mokume gane. I have created this jewelry based on a video I found on YouTube by the channel Magic By Leah. The link is here: https://youtu.be/ZME0LuZpoDE. I recommend that you watch the video before reading further. So, to continue, there are multiple color combinations that can complement each pattern, but you have to be careful when you choose. I chose to make my jewelry set with the round, circle-indented pattern, With a pattern like this, I suggest soft colors, and they should fit into the same color scheme. For example, you could use white, gold, and pearl like I did, or you can use different shades of blue or purple. With the sharper, square-like design, I would recommend dark pinks, or shades of turquoise. Leaving you with these suggestions, I hope you have fun making these!

Pencil Shading

It’s been a while since I’ve taking out my shading pencils, but I think I did pretty well, considering that I haven’t done this in a while. As you can see, I have drawn a Rubik’s cube here, using an HB pencil and a 2B pencil. In case you were wondering, HB pencils have harder lead, so they have a lighter mark, while 2B pencils have softer lead, so they have a darker effect on the paper. When you draw something like this Rubik’s cube, something that has sharp lines, you have to make sure they are all parallel to each other. This will get you the most accurate shape possible. And you always shade the sides tilted inwards darker, to give it a sense of depth. Well, that’s all for this post. Bye!

Rose Studs

These rose-shaped stud earrings are simple, but cute, and making them is a cinch. You start with a very small curl of clay, and as you keep adding thin pieces of clay as you go. Make sure to cut off the excess clay at the bottom when you feel you are finished. I would say that the hardest part of making these earrings is making them identical. There were lots of trials and errors in the process of creating these. Some of my failed designs were too thin and broke apart, and others were so thick that they didn’t look as delicate as I would have liked. Some other failed attempts were different sizes altogether! It just takes patience and observation. There are also many possible combinations with this design. Shades of pink or yellow are also suitable for this piece, and if you have accents like pastels for clay, then you can lightly brush the ends of the rose, creating a beautiful ombre. That’s all for now! See you in the next post!

A Perfect Pair

What goes together better than hot chocolate and cookies? Am I right? This adorable set of polymer clay pieces can be used for just about anything. You can make them keychains for you and your best friend! Or you can make them small magnets like I did. If you decide to make them keychains, you should keep the eye pin flat on the back of the cookie plate, and secure it with a layer of clay. But if you choose to make them magnets, you have to make sure to use a blade and cut a small cavity in the back of the hot chocolate mug, and make sure the small magnetic piece fits in it. You should also try to do the same for the plate of cookies, but if you are unable to do so, then I would suggest making the bottom of the plate as flat as possible, avoiding a convex shape. This was my first time using the pearl clay in my Sculpey 24-color sampler set, and I would say that the results are satisfying. If you’re wondering how I got the hot chocolate into the mug, it is very simple. I used my tools for this, which are also from the brand Sculpey. Using a blade and the rounded ends of the tools shown below, I was able to carve out enough space in the pink cylinder of clay used to create the mug to fit in a small brown cylinder. And just to let you know, these pieces were not based on a YouTube video like some of my other creations. Anyway, thanks for reading! See you in the next post!

These are my polymer clay tools. Rinse the ends for best results every time you begin something new.

Panda

This adorable little panda, made with polymer clay, will keep you company wherever you go. As you know, I try to minimize the use of tools, because why use tools when you have hands? Am I right? Even so, it’s okay to use them for things that our hands just can’t do. For example, I used my exacto-knife to slice pieces to perfection, and to make the ridges in the bamboo the panda is holding, plus a blending tool to seal the gap in the back. Fine details like that are an exception. By the way, when you’re varnishing, make sure you don’t get fingerprints on your charm. Once it’s there, it’s there. Also, remember to cover every little spot with varnish. Always check over your work. Another tip: Be careful with white, gray, or any light color of clay, because once you get little fibers and specks of clay on your work, its hard to fix. This panda used to be covered with fibers, and the first time I tried to fix it, it ended up looking really creepy. All the colors were mixed up and its face was distorted. I had to replace the entire head and the bamboo. To avoid getting into messes like this, always make sure you…

  • Use parchment paper or foil as a work surface
  • Use a fresh piece of parchment or foil every time you start something new or differently colored
  • Wash your hands every time you use a new color
  • Use a paper towel to wipe your hands after you wash them. Cloth towels have more fibers, which will get your clay dirty.

Anyway, that’s it for this post. Thanks for reading!

Wish on a Star

I painted this cute little piece on a canvas as you may have noticed. I made a galaxy background with a shooting star streaking through the sky. For the star and its tail, I cut out a piece of regular printer paper in those shapes and taped them loosely to the canvas so I wouldn’t damage it. I would suggest using Elmer’s tape or any other tape that doesn’t stick. It’s pretty simple. By the way, this is a piece that I came up with, so you probably won’t find this on the internet. I had fun using a foam brush to play around with the different colors in the background, and added a touch of glitter along the edges. Even though I used watercolor, I would still say that acrylic paint would be the best choice. When I was doing this, I probably should have been more careful with the amount of water that I used, because I have a few stains here and there. I don’t think I should have tried to use the black paint either, because I also have a muddy patch or two. But if you use acrylic paint to do this, I would suggest using a thicker paper to paint around. Thanks for checking out my latest post!

Flowers in Watercolor

This is a watercolor piece I created about a year ago. I usually try to make replicas of art that I see on YouTube or Google, but this time I used my imagination and visualized what I wanted to make. If you look closely, you will see that some of the blue from the sky got into the flower petals, adding some extra patches of green. This is because I used a foam brush, as shown below. Whenever you use a wide brush, you have to be extremely careful. But foam brushes are really good for playing around with gradients or blending colors, so they are still useful. Thanks for reading this post!

Swirls ‘n’ Twirls

This is a pair of earrings that I made with polymer clay about a year ago. I use Sculpey clay and varnish, which you can find at Michaels or on Amazon. I have one of the 24-color sampler boxes, but there’s still plenty of clay. These earrings are cute and simple, and even though they’re kind of long, they aren’t heavy ( that is, if you make them right ). I would say that the hardest part of making these was making sure that both swirls were identical, but then again, I happen to be somewhat of a perfectionist, so I sometimes try a little too hard to make things just right. You can use any color combo, like purple and gold, white and copper, or white and gold, but I used a pretty sky blue for the swirls and I mixed two shades of gold to make the tiny beads on top. Try not to make the swirls too thick, or they’ll be heavy and won’t look as good, but not too thin, or they’ll end up falling apart. Be careful when you put everything together, because if you’re not careful, your earrings could break or the varnish could chip. Polymer clay charms and earrings are good gifts to give, especially since they’re handmade. You don’t need tools to do this, which is why I like it. The only time you would need them though, is when attaching the rings, and that’s more of a job for someone experienced. Well, hope you liked it! Thanks for reading!

Rainbow Sunset

As you can see, this sunset is an oil pastel piece. This is an attempted replica of a piece that I found on YouTube. Now, you might think that this looks unrealistic, but sometimes, during sunset, the sky looks like an upside-down rainbow. Since I was more of a beginner when I made this, it looks pretty different from what it looked like on YouTube. The hardest part of this was the blending. I would say that the bottom area was blended the best. I realized that day that blending oil pastels is a lot harder than YouTubers make it look. You also have to use a specific type of tissue. I used a party napkin and it worked out just fine, so that’s another option. Another way I could have made this better was if I made the colors softer and lighter by putting less pressure on the oil pastel when I was coloring. In the video, they used glass marking pencils to draw the trees, but since I didn’t have any ( or know what it was ), I just used a Sharpie permanent marker. Sometimes, it’s hard to find alternatives, but eventually, you’ll know what to do. Hope you feel inspired!

Design a site like this with WordPress.com
Get started