Art, designs, materials… FUN! Am I
right? I hope you agree. Just like you, I am another one of those art lovers in
this big, beautiful world, and I love it when my creativity leads me to making
a wonderful piece of art. But there are some times when I get stuck and need an
inspirational boost, like writer’s block. ( What would you call that? Artist’s
block? ) So I created this website to help and maybe inspire beginners like me
who are making their way up the levels of expertise. Here, you will find
pictures of art that I have made and tips to help you be more successful.
But before we get started, there are
a few things you should know about the way I do my art:
I try to use my hands more than my tools.
I use positive feedback.
I put hard work, dedication, and passion into my art pieces.
Hi! This is a new watercolor piece I’ve been working on and it’s really easy to do. First, create the the spaces for the trees and the line where the sky meets the ground. I would recommend using easily peeling tape for this step. Then, paint the sky, making a gradient. Add the pine trees in the back, making them fade in from each side, giving the scenery depth. Next, lift the tape and paint the birch trees with a pale gray and add strokes of pale blue-gray to define the snow. Add details to the birch trees and soften the line between the snow and the trees in the bathroom. That’s all! This was a quick, simple project, so you can do it anytime. Hope this inspired you!
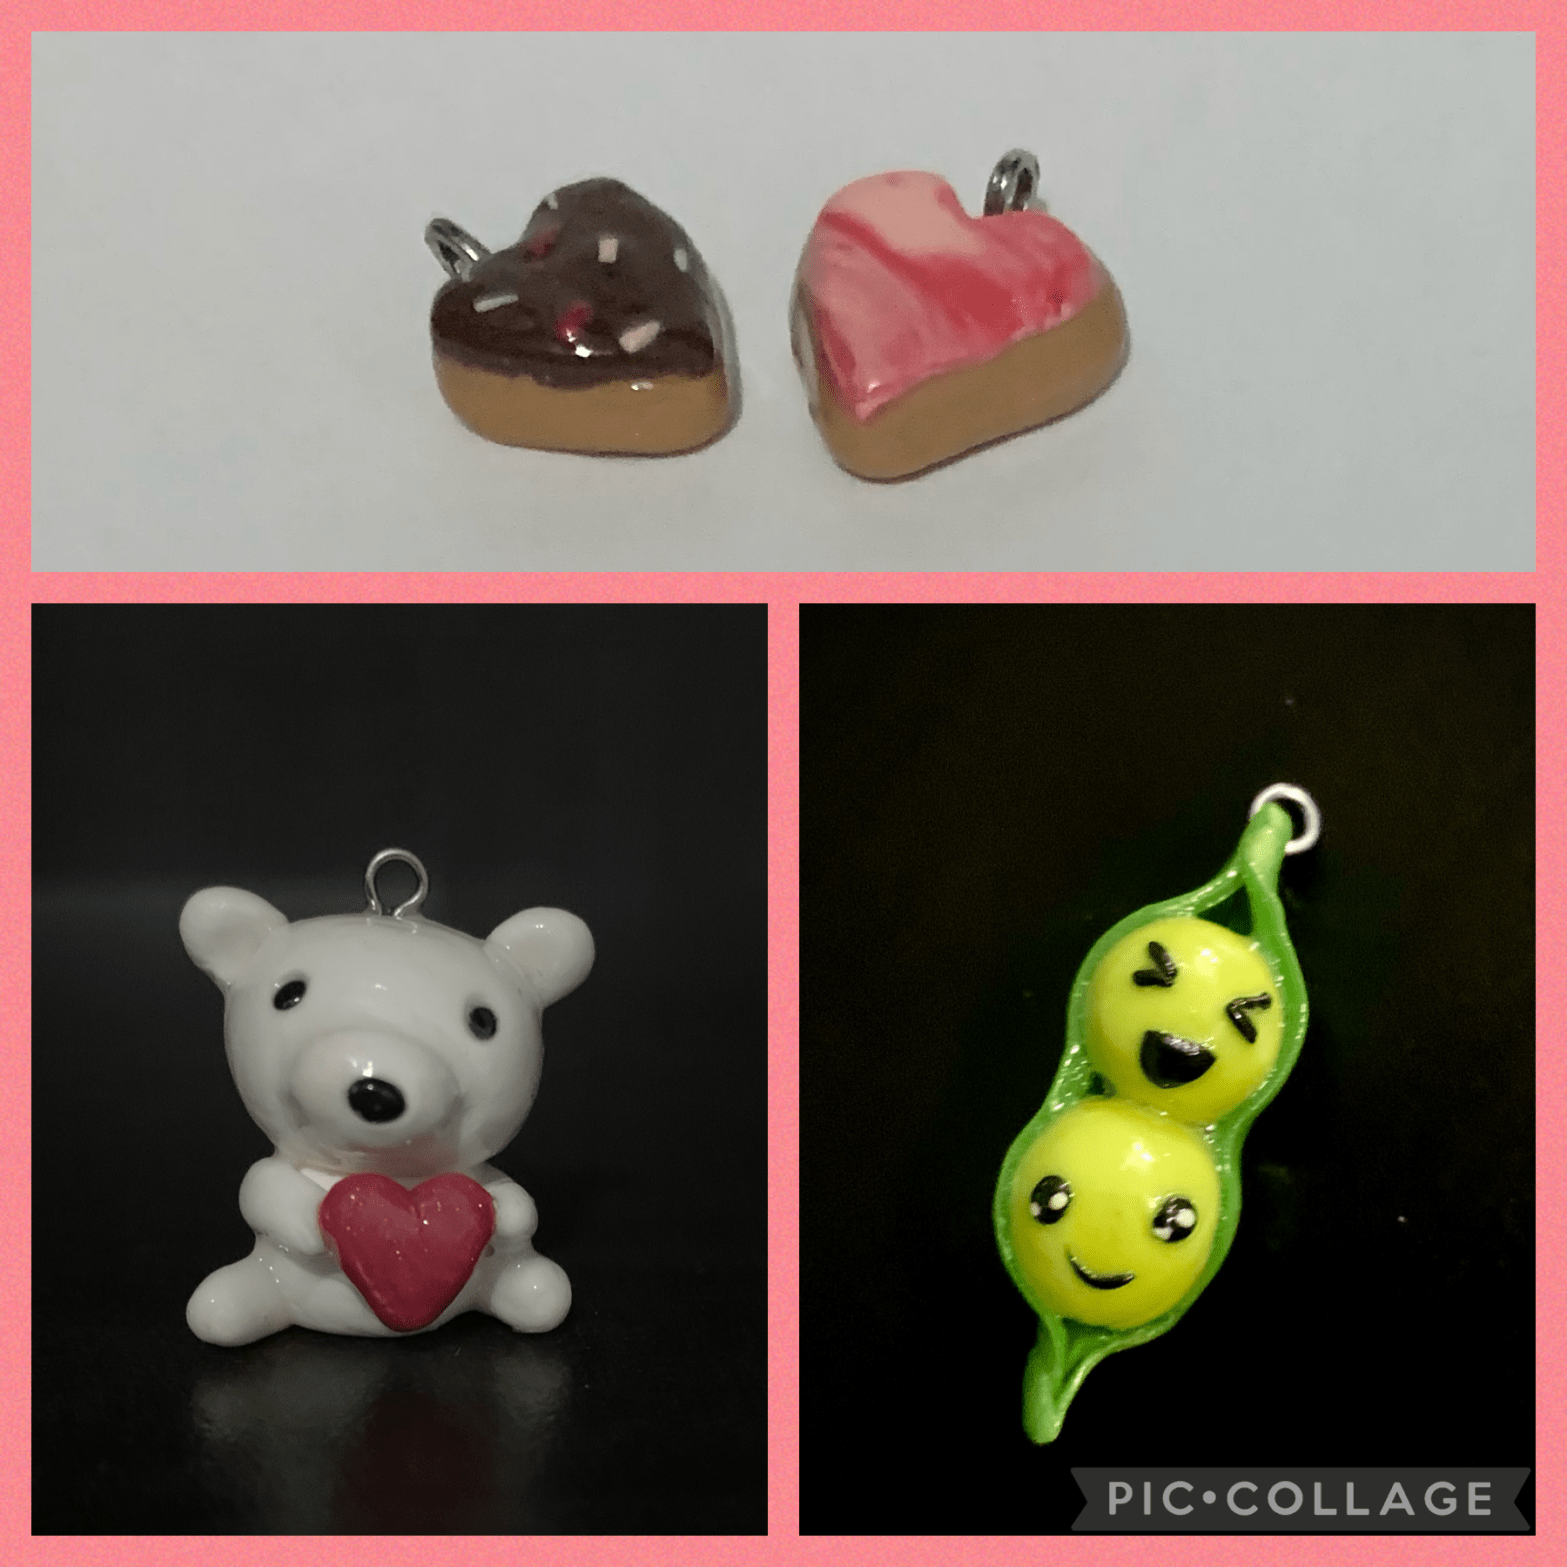
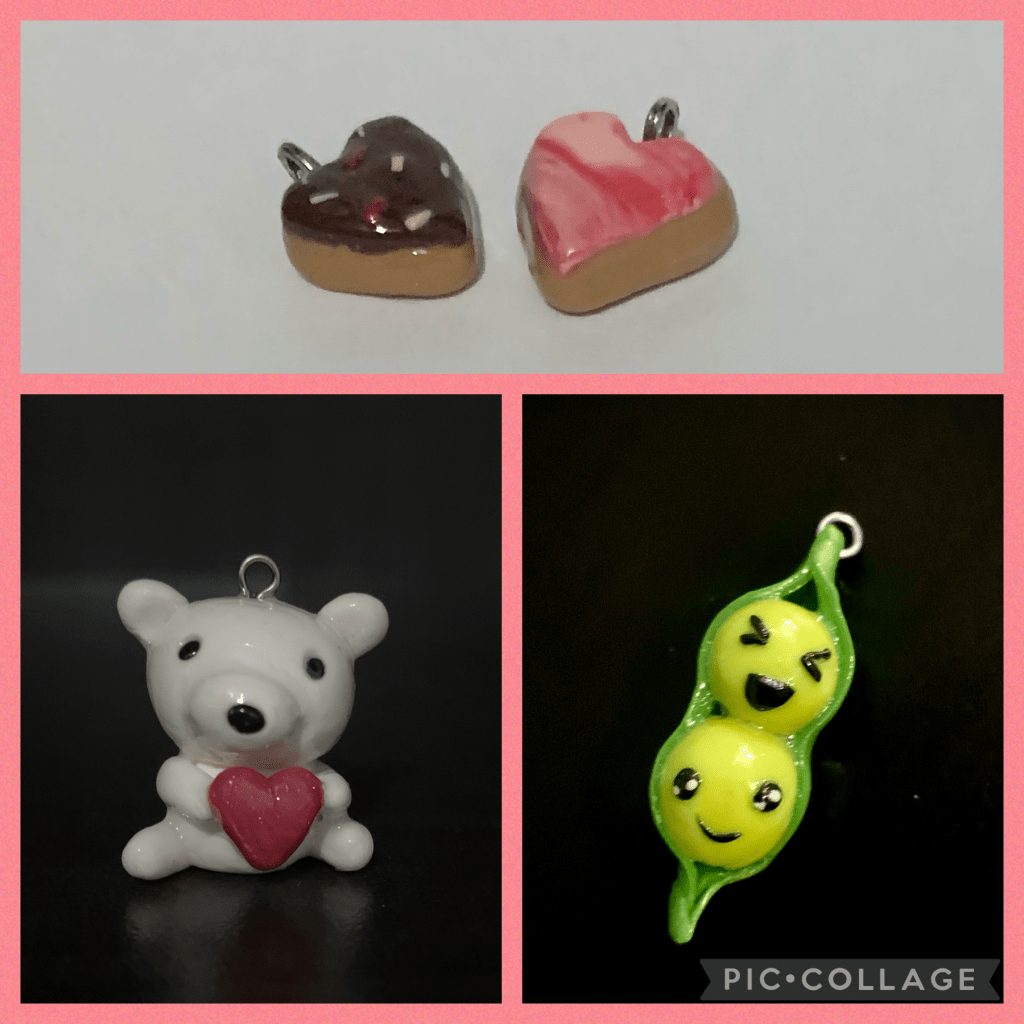
Hi! Even though it’s a little late, I still wanted to share my Valentine’s Day pieces from this week. At the top, I have heart shaped donuts that I made. On the bottom right, there are two peas in a pod, and on the bottom left, there’s a teddy bear. You can make these and give them as small gifts to your friends and loved ones. Hope you liked it!
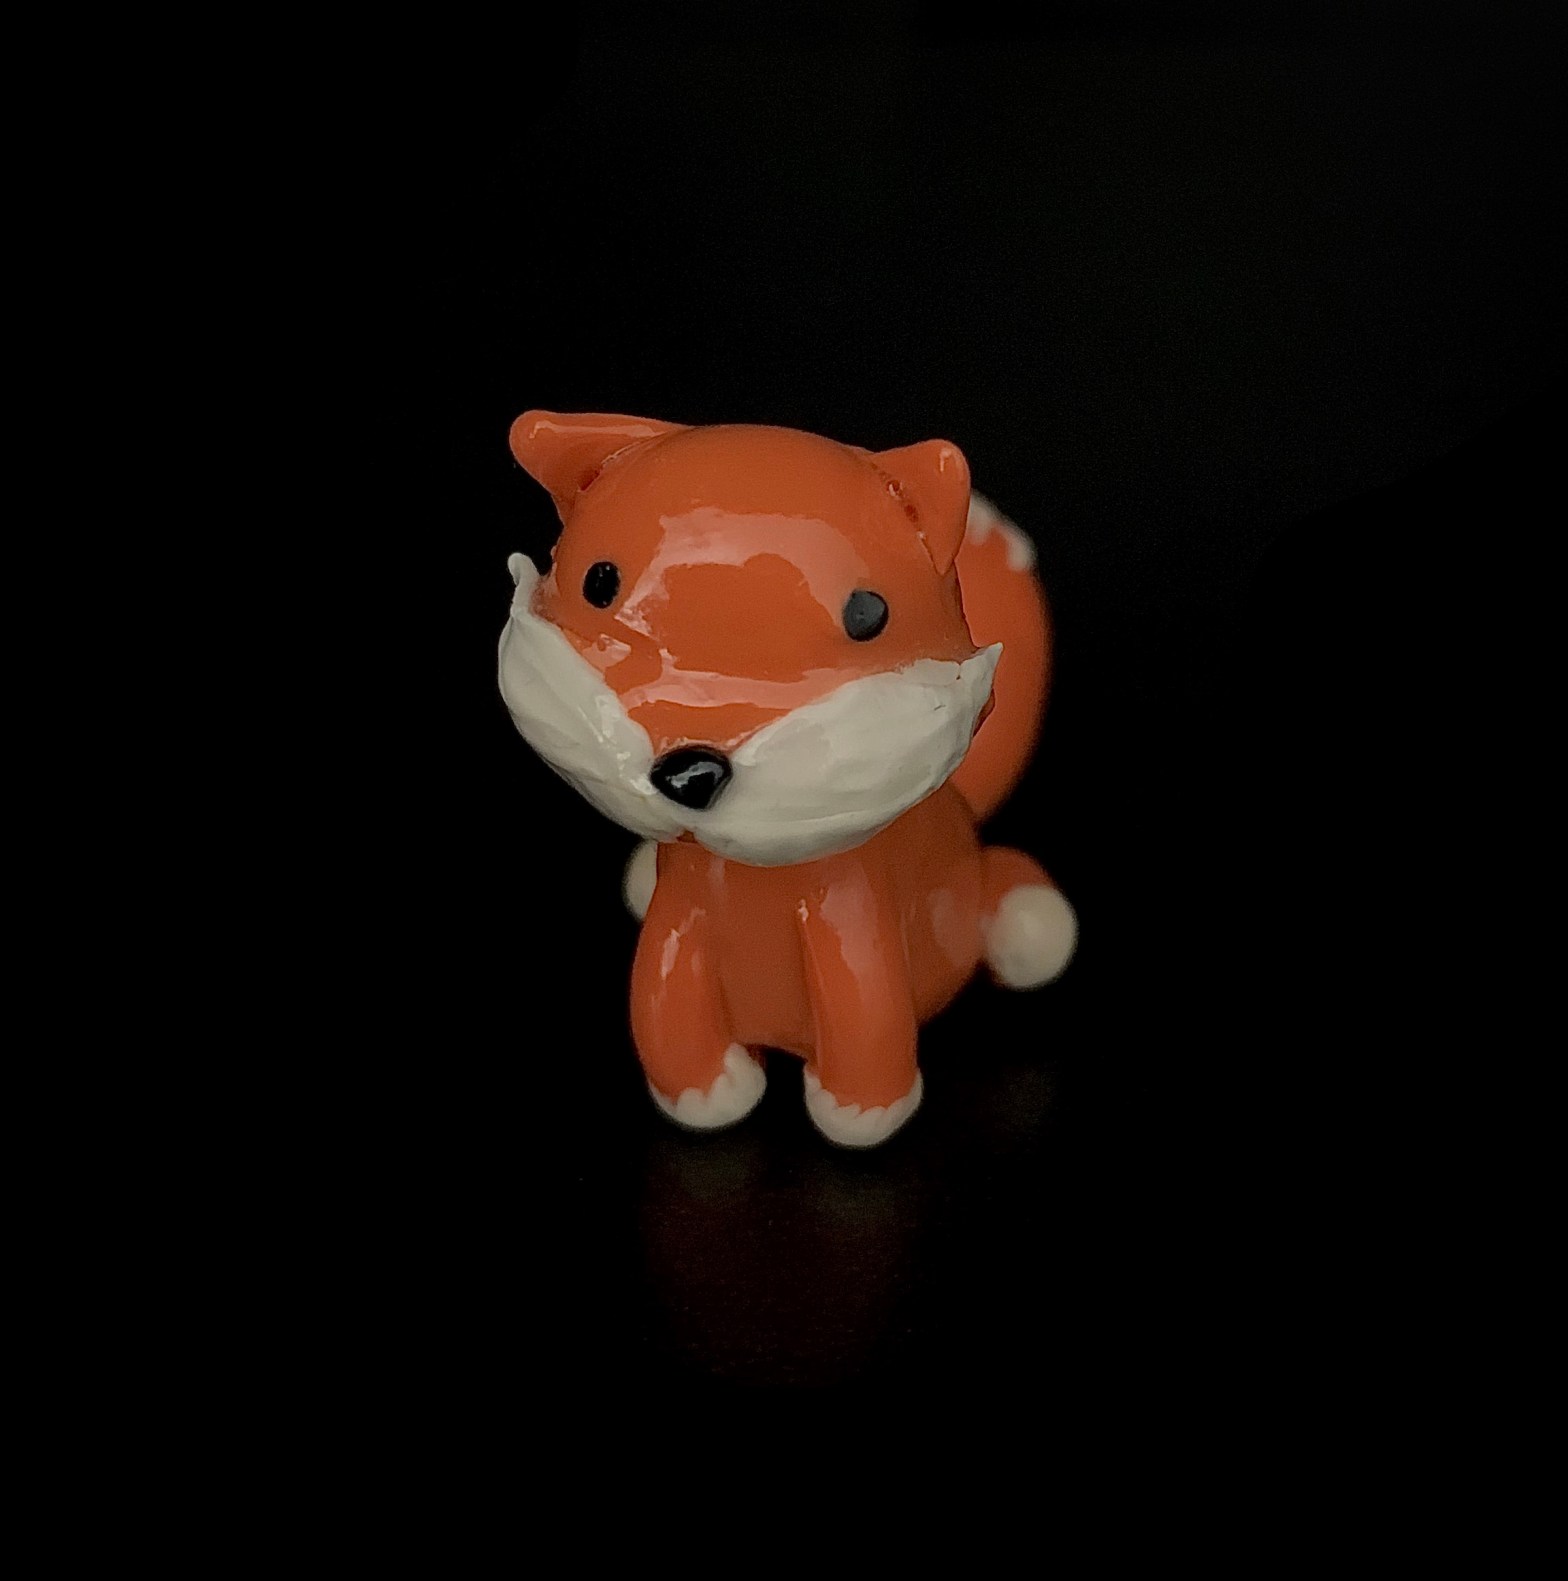
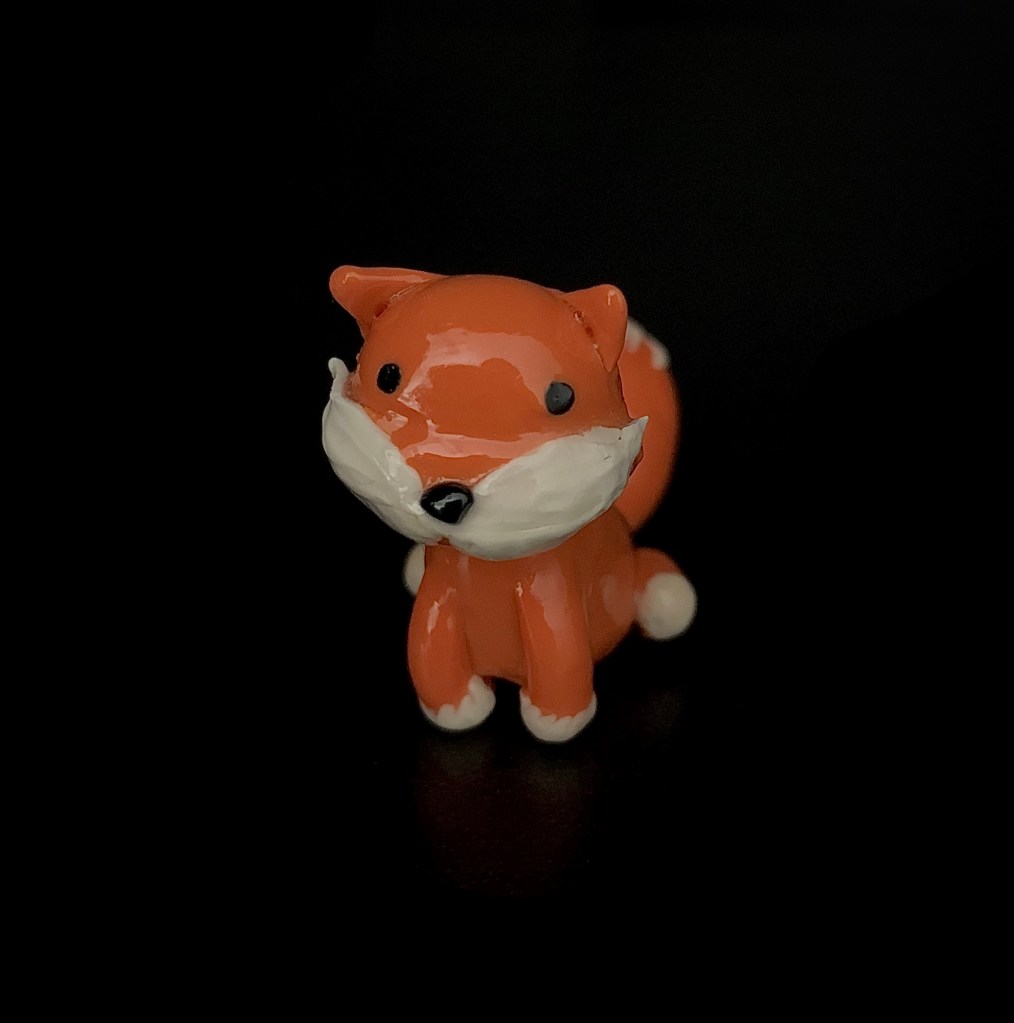
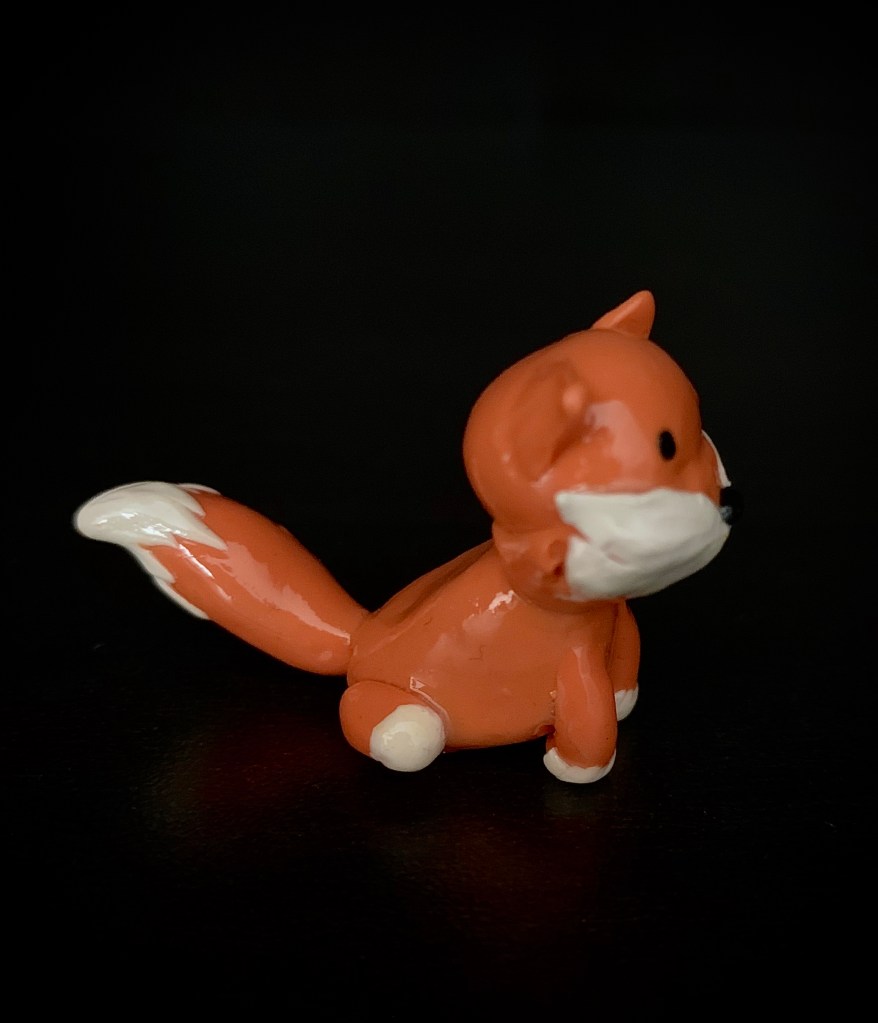
Hi readers! The last few times you heard from me, I did a few watercolor and oil pastel pieces. I decided, though, to mix things up and do a polymer clay project this time! I have sculpted an adorable baby fox for you to see, and I hope you like it! During the process of creating this, I came across a few difficulties, such as the shape of the head. In the end, I decided to put a hemisphere shape and a wide triangular prism together, using a thin strip of the same clay to conceal the area where the two shapes met. I also had trouble making the ends of the white fur look jagged and realistic. All it took was plenty of trial and error. I had to attach the head and tail with small wires, use a blade to shape the bits of white fur, and use a ball stylus tool (see my post A Perfect Pair for more info) to create streaks in it. All in all, I’m satisfied with the outcome of my work. See you in the next post!
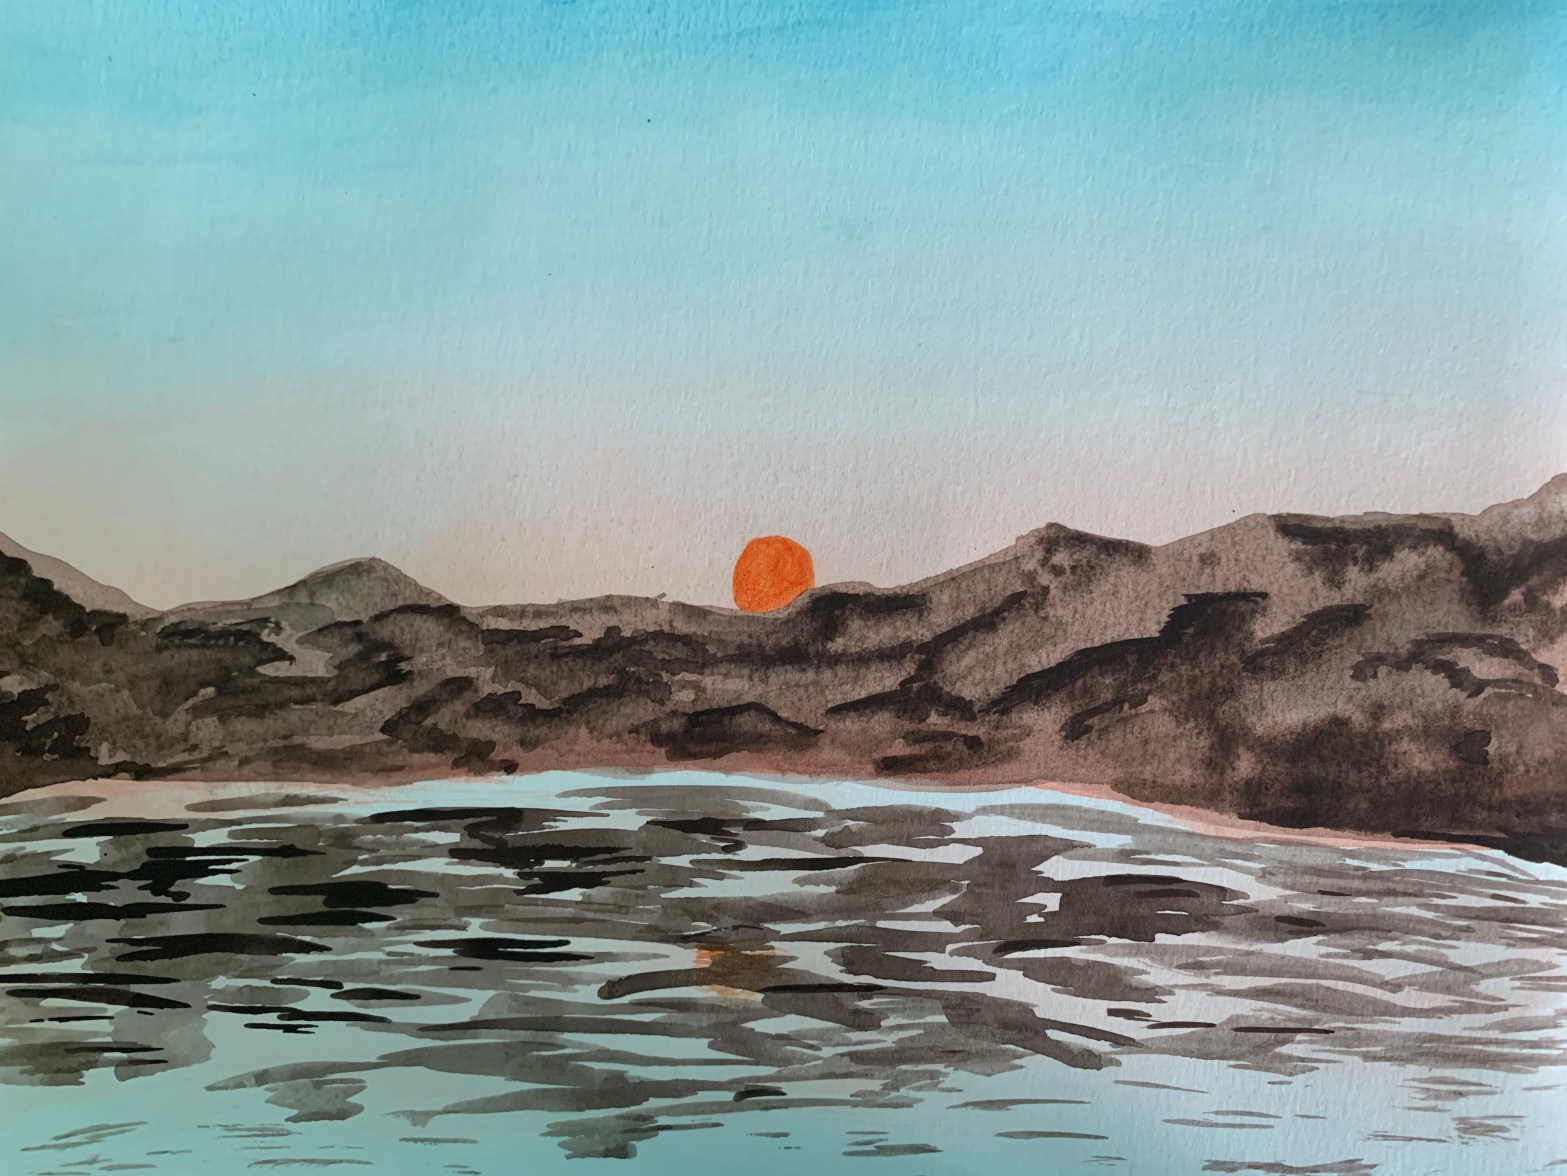
Hi readers! I know it’s been some time since I last posted, and I am very excited to bring you new content today! I painted this piece with my Articci watercolors (see previous post, Watercolor Peacock, for details) yesterday, and was inspired by a YouTube tutorial I saw. This the first landscape I’ve painted with watercolor, and I am very happy with the results. I started by lightly brushing the entire paper with a layer of water, then adding color by color to form this beautiful piece. Some parts of this painting I would like to point out are the sky, the rocks, and the reflection. Note that the sky is very pale, and the colors are watered down. For this, I used a blend of cerulean blue and white for the top half and a mix of vermillion and scarlet for the bottom half. Also notice that the rocks had visible and realistic-looking grooves and edges. I used one color, raw umber, but used different amounts of water in different areas to create a 3-dimensional look. I would like you to take a closer look at the reflection in the water as well, where I subtly mirrored the colors of the sky, then added streaks of raw umber to resemble the reflection of the rocks in the lake. The sun behind them was a finishing touch, tying the piece together. That’s all I have for you now. Hope you enjoyed reading this post, and subscribe to my blog to get new content delivered to you immediately!
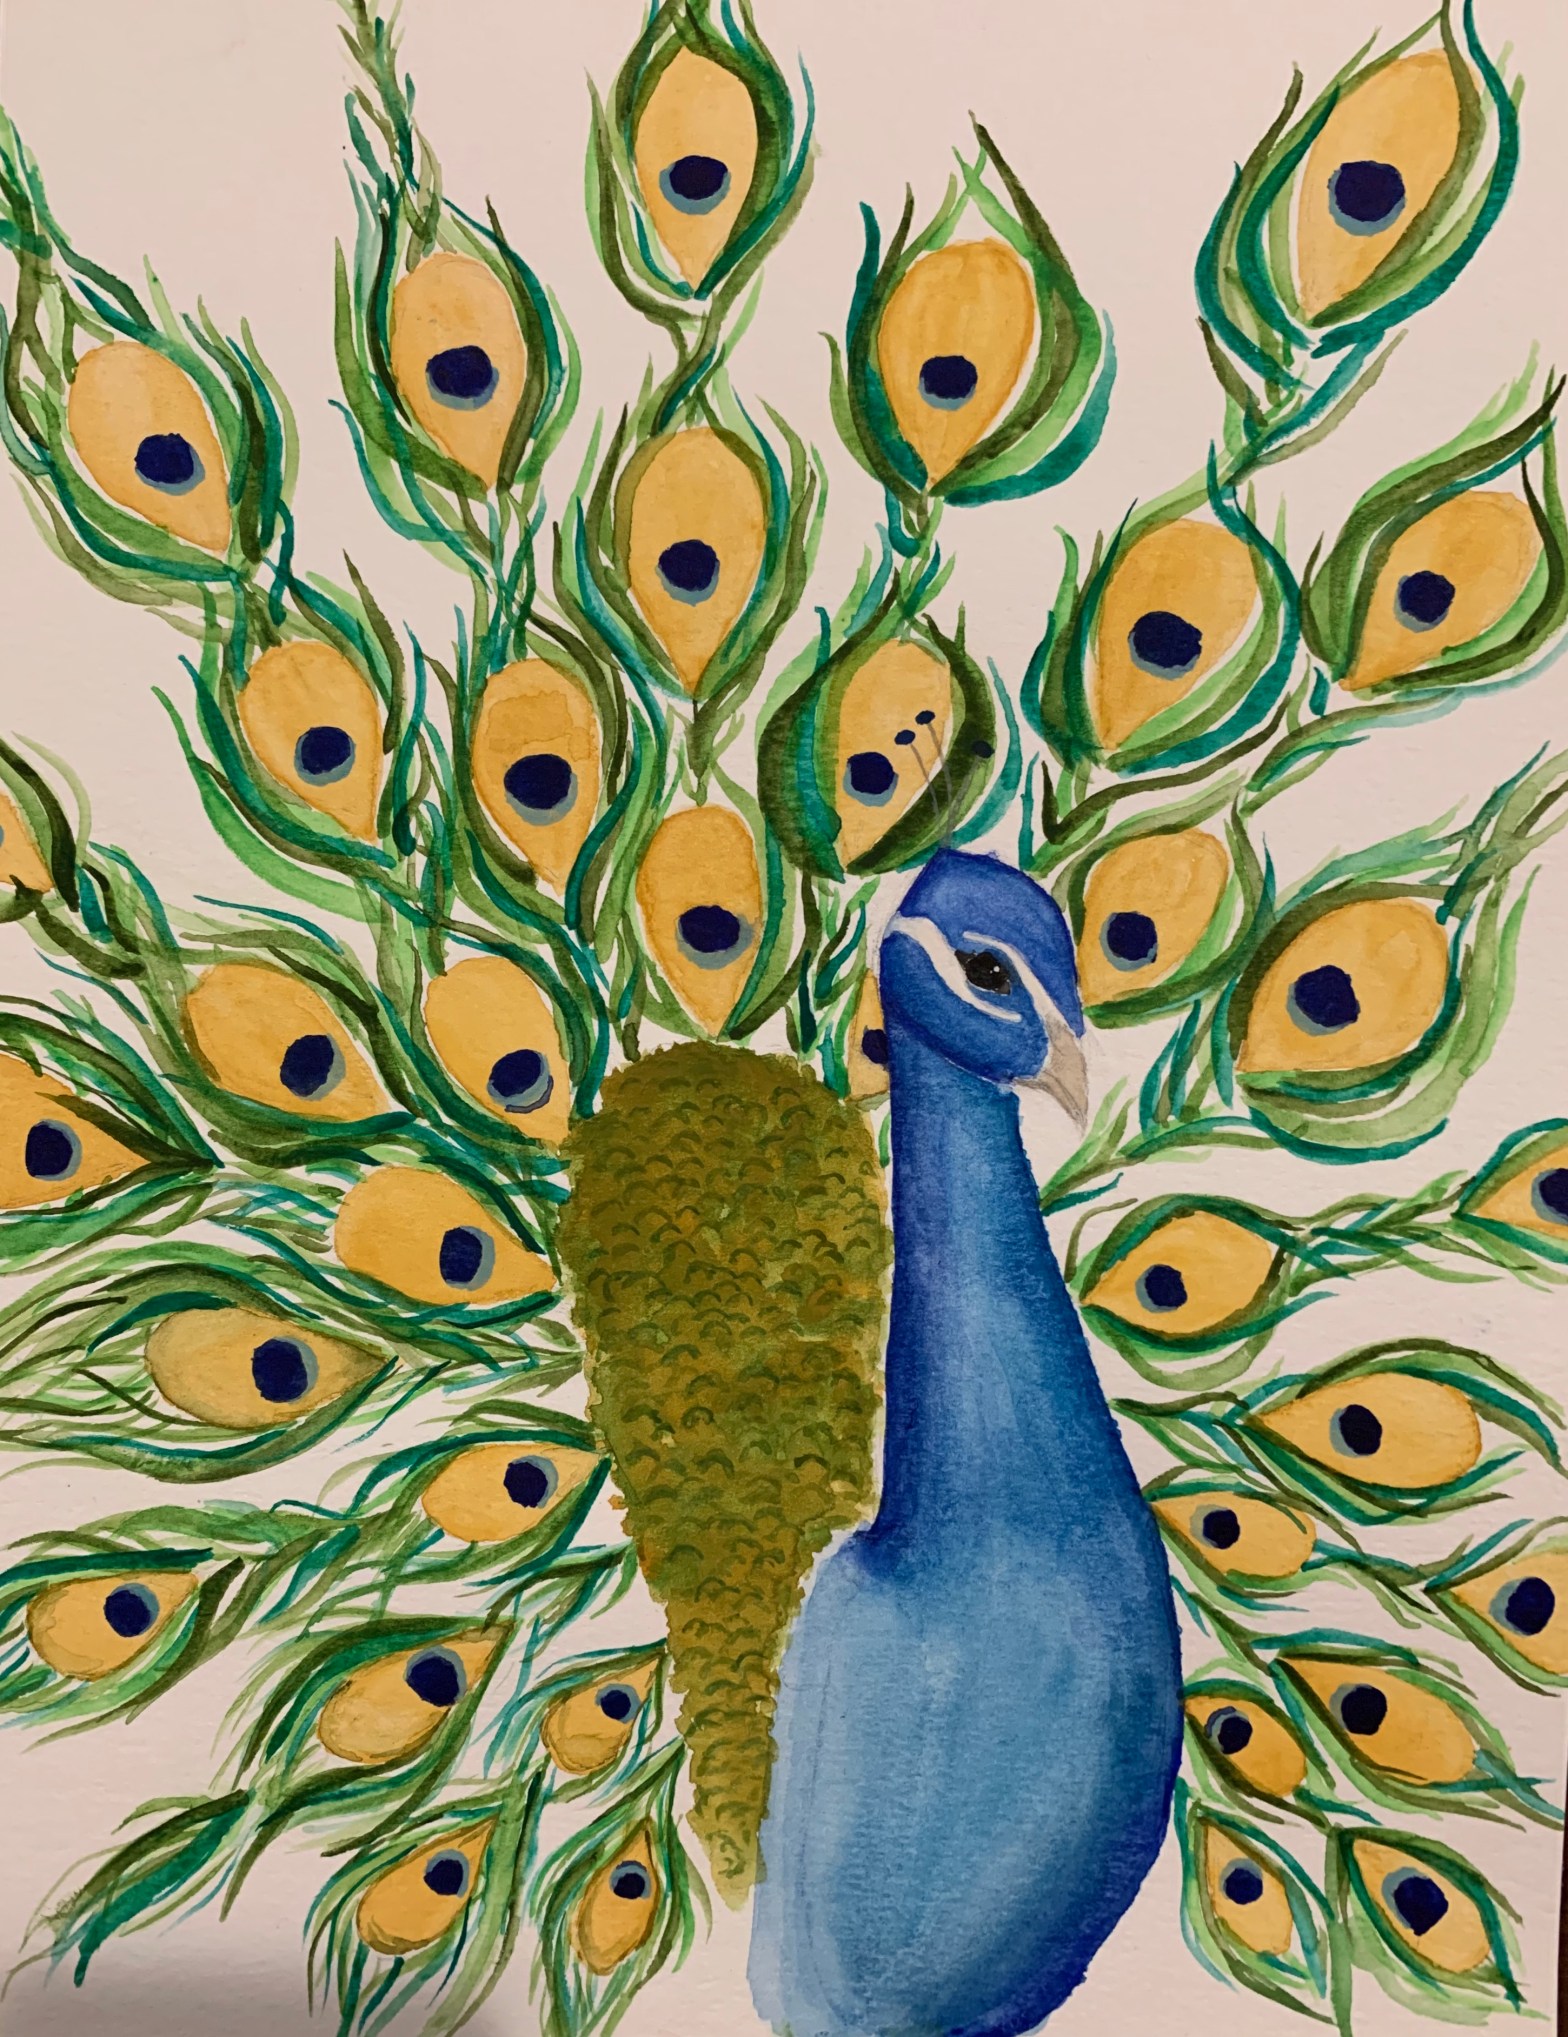
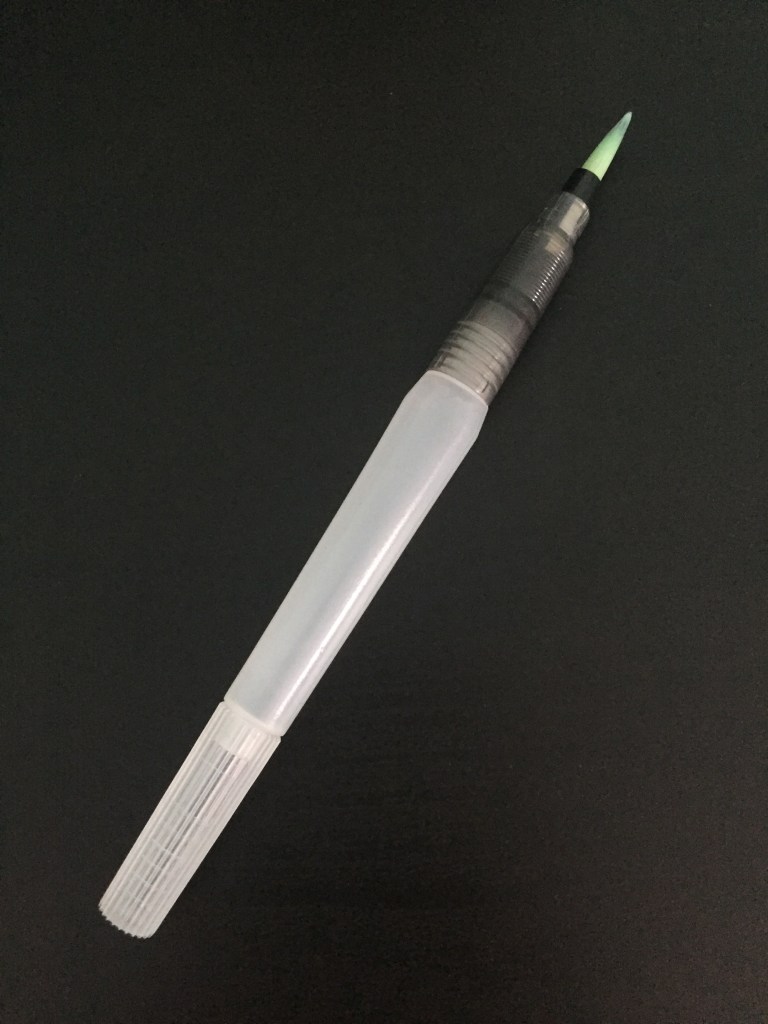
Hi readers! I know it’s been a while since I last posted, since I have been working on one of the largest watercolor pieces I have ever created, which is shown above. This piece took a lot of time, approximately a week in total. For this painting, I used Articci watercolors, which I highly recommend for watercolor projects. An image of the watercolor box is given below. The watercolors also came with a brush, a water brush which allows the artist to dilute the paint as they go. Using this brush, I was able to create thin lines, curved lines, lines that go from thick to thin, and blend the colors. This brush, of which an image will also be provided below, is a necessary tool when it comes to watercolor. I started with sketching the outlines of the body & the feathers of the peacock. For the head and body, I looked at pictures of real peacocks and observed that they had small, narrow heads with long necks that started out thin and quickly grew thicker closer to the base. Imitating that, I moved on to the greenish ruffle under the feathers. A teardrop shape works best for this. For the feathers, I started off drawing lines going outwards, and lightly sketched upside-down teardrop shapes distanced by an inch. To paint this piece, I used the colors white, ultramarine blue, cerulean blue, cobalt blue, emerald green, sap green, viridian, hooker’s green, yellow ochre, and black. The body was a blend of ultramarine blue and cerulean blue, and the ruffle was a mix of hooker’s green and yellow ochre. The center of the feathers is lightened yellow ochre, with a spot of ultramarine blue outlined with a pale cobalt blue. The green part of the feathers included all the shades of green: emerald green, sap green, viridian, and hooker’s green. Using the water brush I mentioned above, I made curved strokes going from thick to thin starting at the base of the yellow ochre teardrop shape and going up. This step takes a while, which is what took me a while. The details on the face were the hardest part, so I used a picture of a peacock as a reference.
Articci watercolor paintwater brush
I hope this post inspired you, and if you want to be alerted when new content arrives, please subscribe!
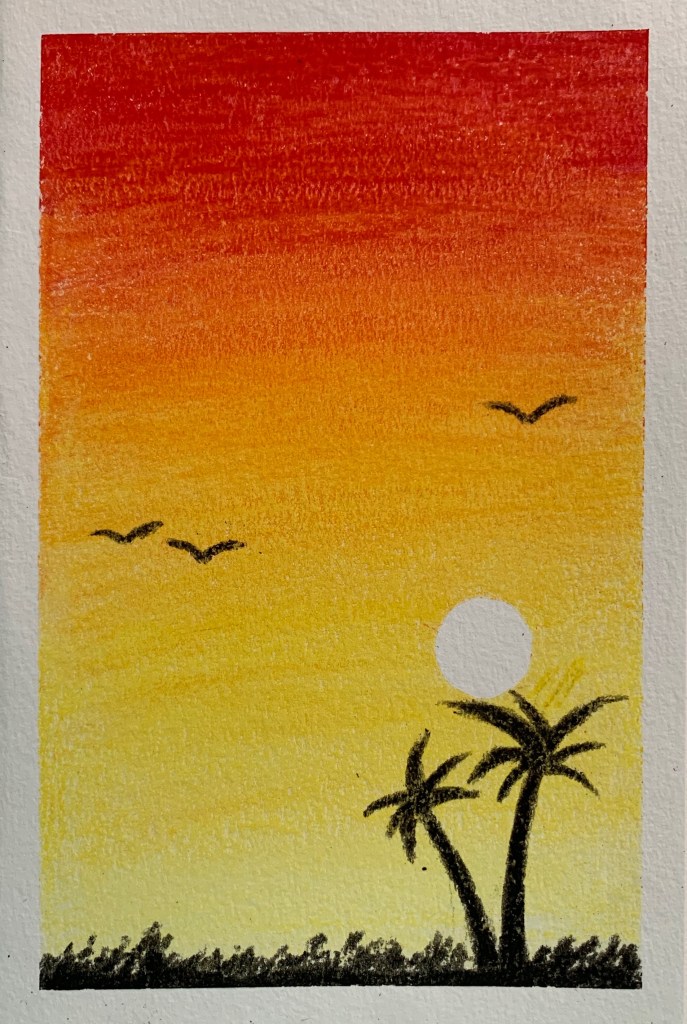
This is a small, comparatively quick piece that I did for Mother’s Day this year. To start off, line the edges with tape. Masking tape or any tape that comes off easily without leaving a mark will do. You also have to cut a small circle out of the tape and place it wherever you would like the sun to be positioned. The rest is simple. All you have to do is arrange shades of red, orange, and yellow in order from darkest to lightest, and blend! Blending, itself, is the hardest part, though. Please do not be fooled by oil pastel tutorials that blend their colors in 2 minutes like I was. But the rest looks pretty self-explanatory. If you don’t have something to blend with, see my post Rainbow Sunset for suggestions. I hope you enjoy making this, and if you found it helpful, please leave a like or a comment. Bye!
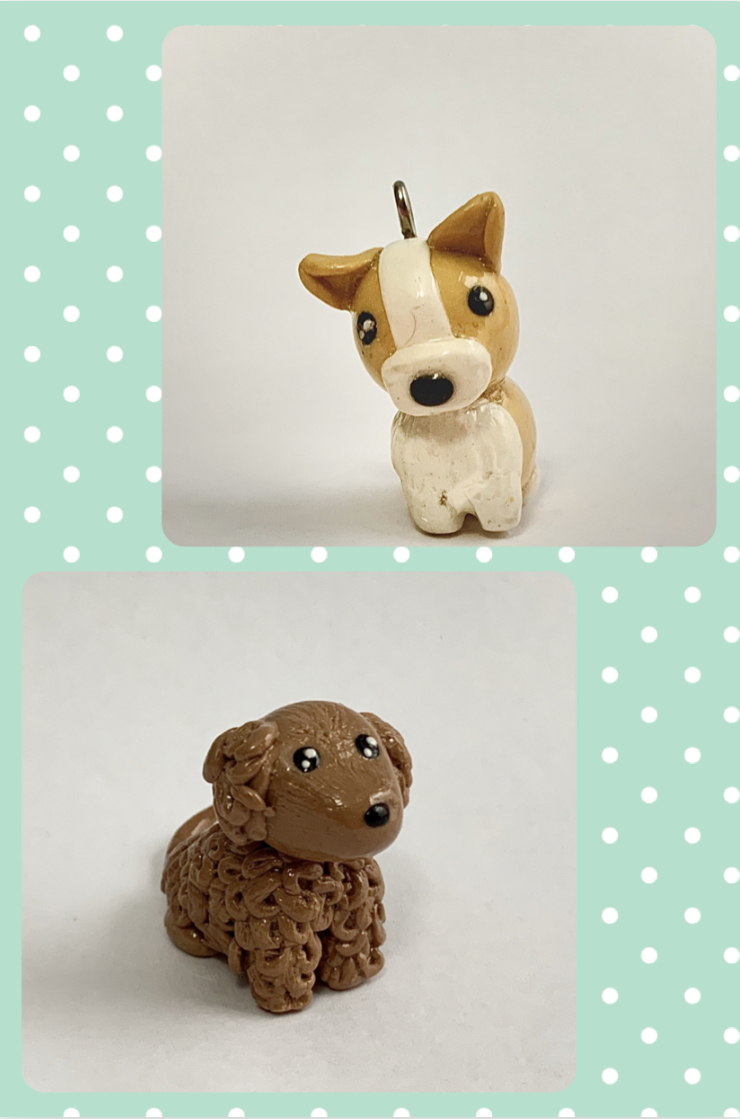
Hello viewers! May the 4th be with you! 😄 As you can see here, I have made polymer clay puppies! The one on top is actually one of my older creations, as opposed to the one on the bottom, which was made more recently. I used techniques and ideas from a picture on Pinterest and a YouTube video. Here are the links:
As you may have noticed, neither of my creations are an exact duplicate of the pieces above. From the Pinterest image, I replicated the fur feature for my polymer clay cockapoo. I curled small, flat pieces of clay, gave them a fur-like texture with a blade, and stuck them on. This requires a lot of time and patience, and a fine-tip blending tool as well. If you would like to see images of what to use for this step, see my post, A Perfect Pair, for a picture of my blending tools. Something I did that set my polymer clay puppy apart from the one above was the size, shape, and proportions. I made a slightly larger head and body than the image shows, and the shape of the body in the sitting position contrasts the piece on Pinterest. The sitting position, though, is the same for both the cockapoo and the corgi that I have shown you. For this, I shaped the body into almost a triangle, but instead, it was slightly bent. And now, that brings our focus to the corgi. First things first, I will acknowledge that the artist in the video DID use air-dry clay. However, this does not mean that you can’t make a replica using polymer clay. Using similar colors, I followed most of the guidelines the video provided. I made a few minor changes, like the eyes and ears, but other than that, my polymer clay corgi and the YouTuber’s clay corgi look pretty much the same. Well, thank you for reading this post! If you would like to see more content more often, please subscribe to my blog! Bye!
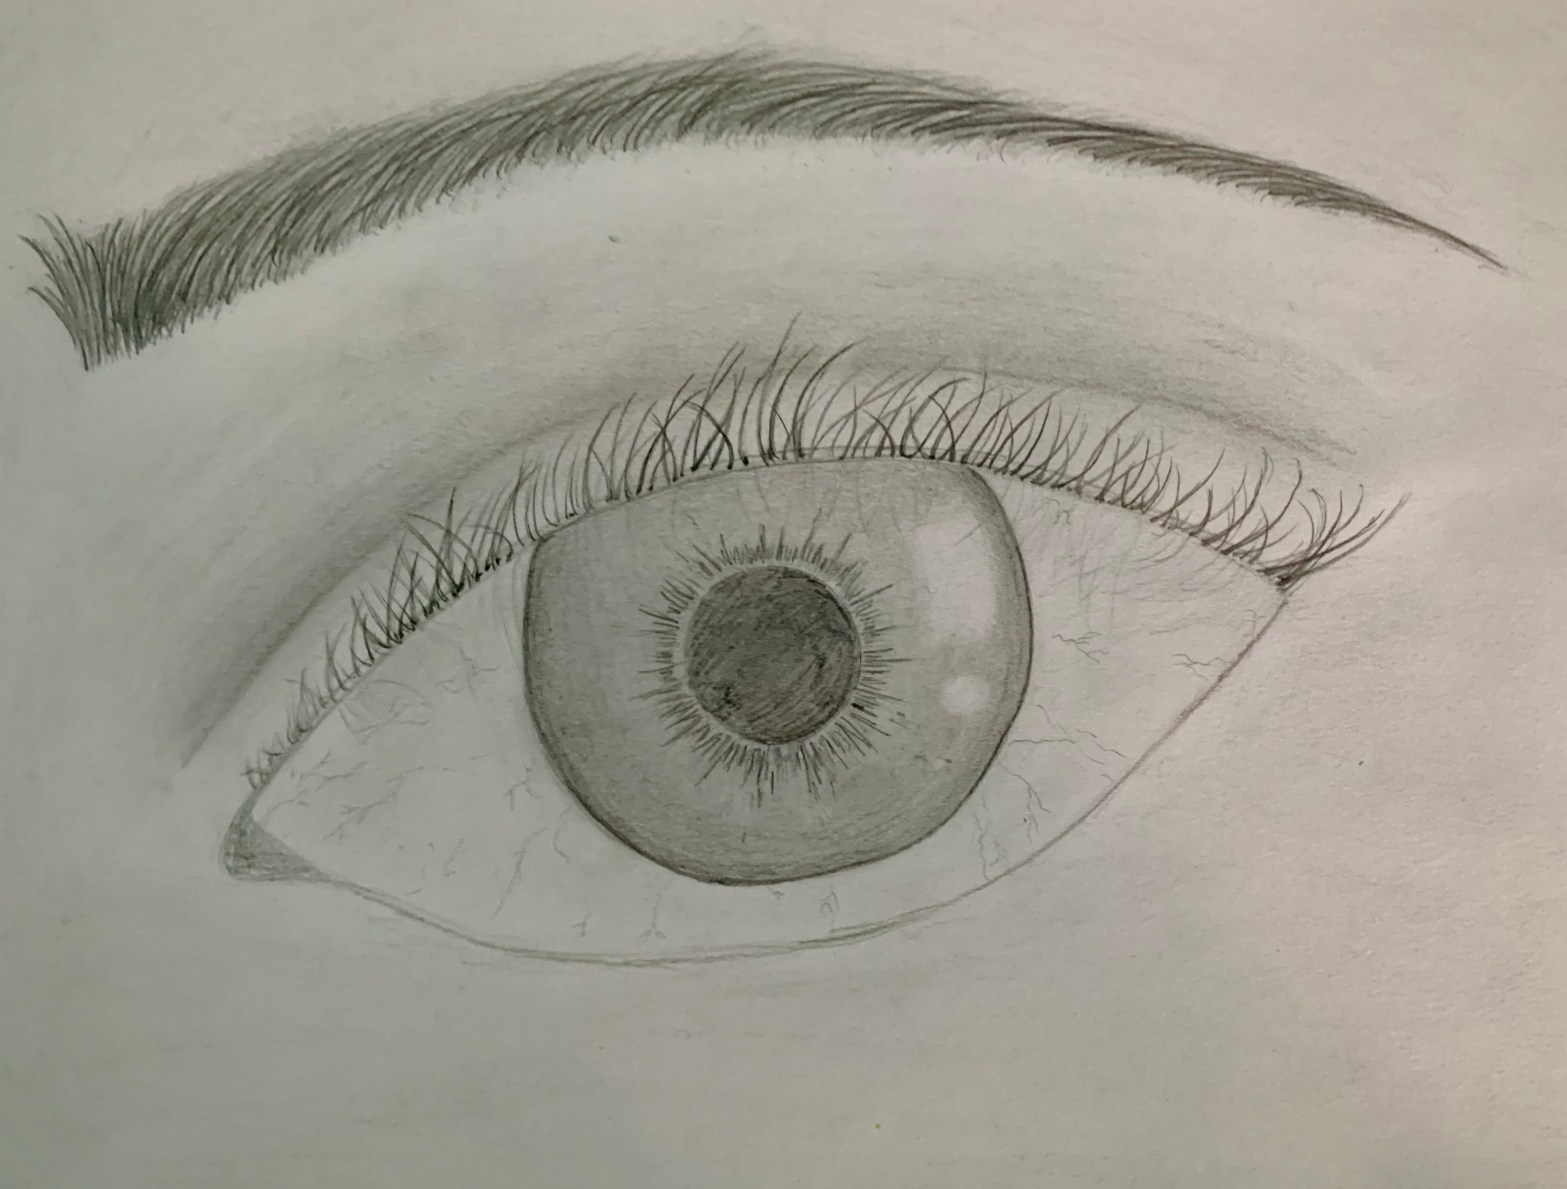
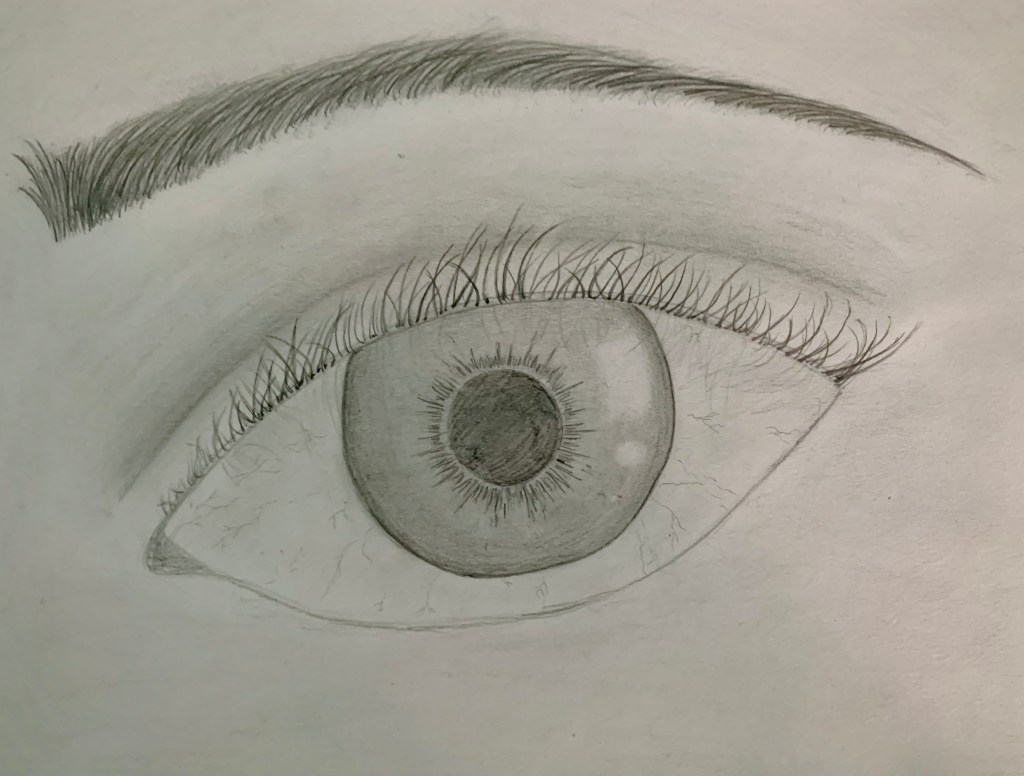
Hi there! So, as you might have known, pencil shaded eyes are a typical doodle, and today, I’m displaying my take on the classic drawing. This took multiple days (full at-home days of quarantine) to finish, so don’t expect to get it perfectly in one afternoon. Here are a couple tips to be successful in a drawing like this:
Don’t draw a shape that is parallel to the paper. A perfectly straight eye looks pretty unnatural.
Always draw the eyelashes in different directions. It also helps create a more natural look.
Make sure to shade in the crease of the eyelid.
Draw spokes around the pupil like I did to make it look more realistic.
With a very light and thin pencil (HB or thinner), include fine details like arteries and the reflection of the eyelashes.
Draw a thin outline behind the eyelashes.
In that thin outline, the eyelashes’ roots should be darkened.
Outline the iris with a dark, thick pencil, and shade inwards slightly from that outline.
Leaving you with these suggestions, I hope you enjoy drawing this!
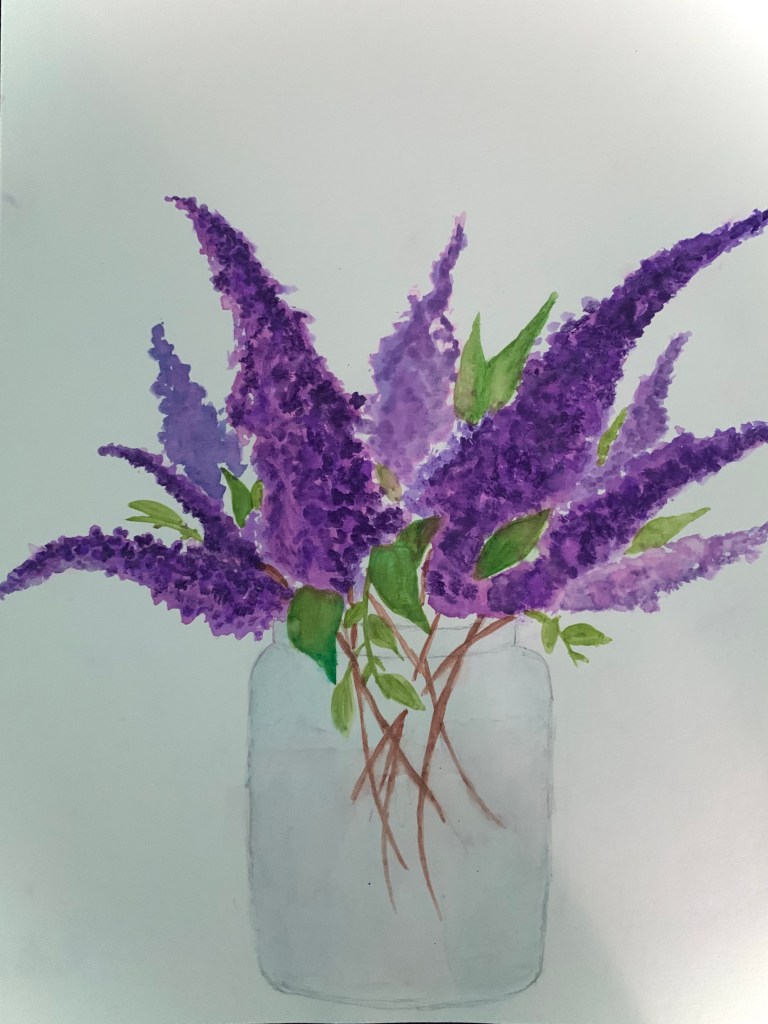
Hi everyone! As you may have observed, I haven’t posted a watercolor piece (aside from the card) in quite a while now! But since we’ve been in quarantine for the last month or so, I’m finding more time for art than I did when I was going to school. I realized that I hadn’t taken out my watercolors out in some time, so I decided to go with something a little bit on the easier side. You can also paint this on a card, as it is a low-scale project. For this piece, I used techniques from a YouTube video, but went in a completely different direction. First, you have to draw the jar. When it comes to painting it in (this is one of the later steps, and must be done after the flowers), I would suggest a pale, watered-down shade of grayish-turquoise. For the flowers, I dabbed water into the shapes I wanted them to be in, and if you have the right watercolor paper, you’ll be able to add color with a light touch of your brush, just like I did. Leaves can be anywhere and everywhere, and you can even try adding different colors on the ends. So, as you can see, this is a pretty simple piece, and does not take a lot of time. Hope you enjoyed this post!
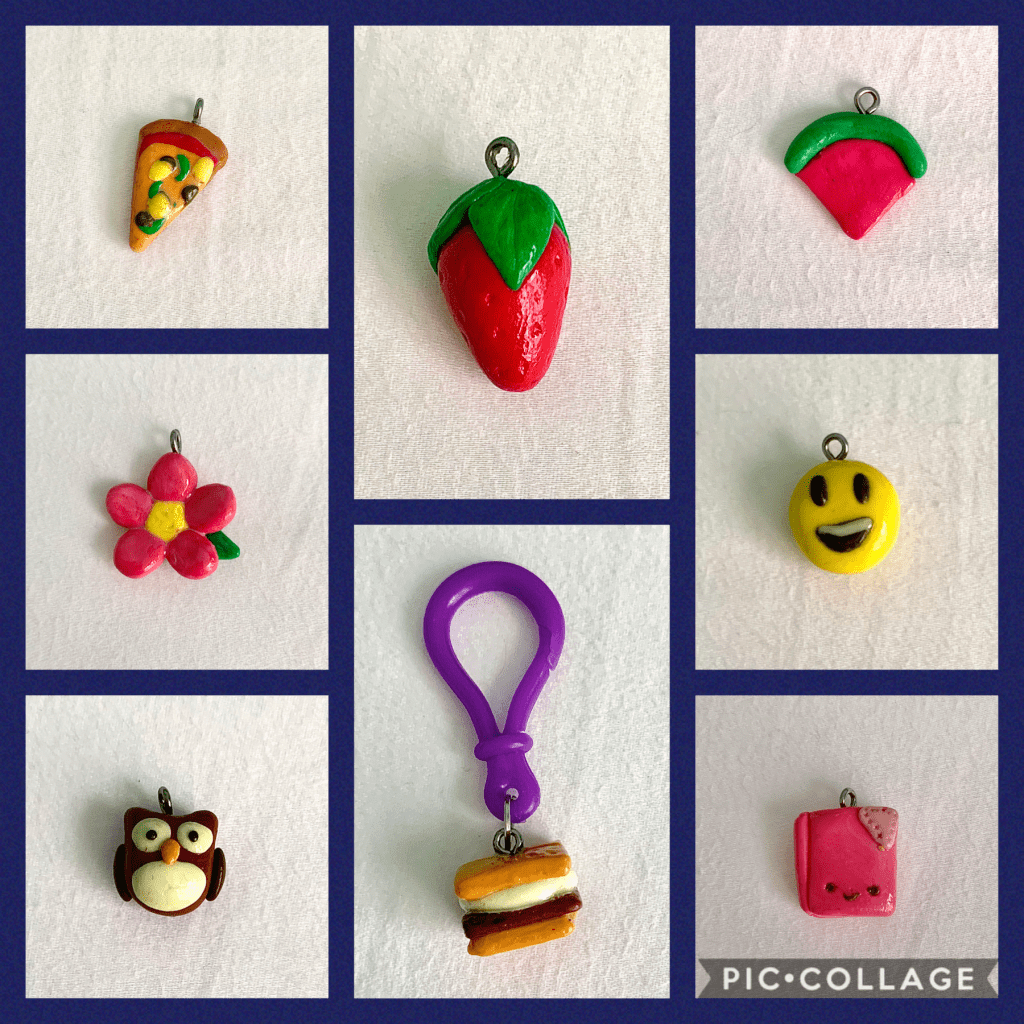
Hi everyone! So, you know that I have been showing you decent, if not wonderful, polymer clay pieces (see earlier posts). But if you were wondering how my pieces reached that level of artistry, well, like any other artist, there were a lot of not-so-amazing pieces behind the masterpieces. This is how I started off with polymer clay. These are some of the first charms I made, the strawberry in the center being the oldest. In fact, back then, I didn’t use Sculpey clay at all! I started off with a small polymer clay kit from Toys ‘R’ Us! Eventually, making these pieces sparked a love for polymer clay, so I bought the Sculpey sets. If you were wondering what the small, pink rectangle in the bottom right corner is, it’s a book. So if you’re having trouble starting with polymer clay, just remember that we’re all in the same boat!